Tuesday, December 28, 2010

Getting ready for the stand

Getting ready to move the engine off of the pallet and onto the roll around lift-cart. This cart has turned out to be very handy for moving engines and crates on and off of the back of my truck and looked like an easy way (with my low ceilings) to lift the engine up to the height of the engine stand.
Wishful thinking as I have a lot of work to do yet to make this a reality. But I think it looks cool there on the nose. Just like an Indycar or the old F1 cars...
You just can't do this with your father's Formula F motor. I simply lifted it up off of the pallet and set it on the lift cart. I swear this motor really doesn't weigh much more than the Suzuki GSXR1000 motors I have gotten so used to changing out in recent years...

Lift cart raised and ready to affix the engine stand 'yoke'. Need to get new longer bolts tomorrow...
Posted by Picasa

Monday, December 27, 2010

Snow Bound

Well, not exactly, but close.  Tonight I stopped by my mom's house to retreive the engine stand that she has very understandingly been storing in one of her sheds.  All went better than expected in extracting it from under piles of pool toys and other summer items, and in no time I had it loaded in the back of the truck and was headed home for an evening of engine reconfiguration - or so I thought...

Leaving mom's driveway turned into a big adventure.  The 2-3' vertical rise from the middle of the horseshoe to the exit was a slippery frozen mess, and after half a dozen tries, I was STUCK!   Thankfully, FE racer and 4WD Diesel Dually owner Eric Cruz lives right around the corner.  So a quick phone call and he was on the way. 

Even with his 3500 Chevy Dually doing the pulling we had a heck of a time getting the old Dodge over the rise and out into the street.  (Thanks Eric! - I owe you another one).

Not the most auspicious beginning to the evening.  But now after a little dinner and football enthusiasm is running high again and I am ready to dig back in.  So out to the garage...

Sean

Friday, December 24, 2010

A small wrinkle in the process...

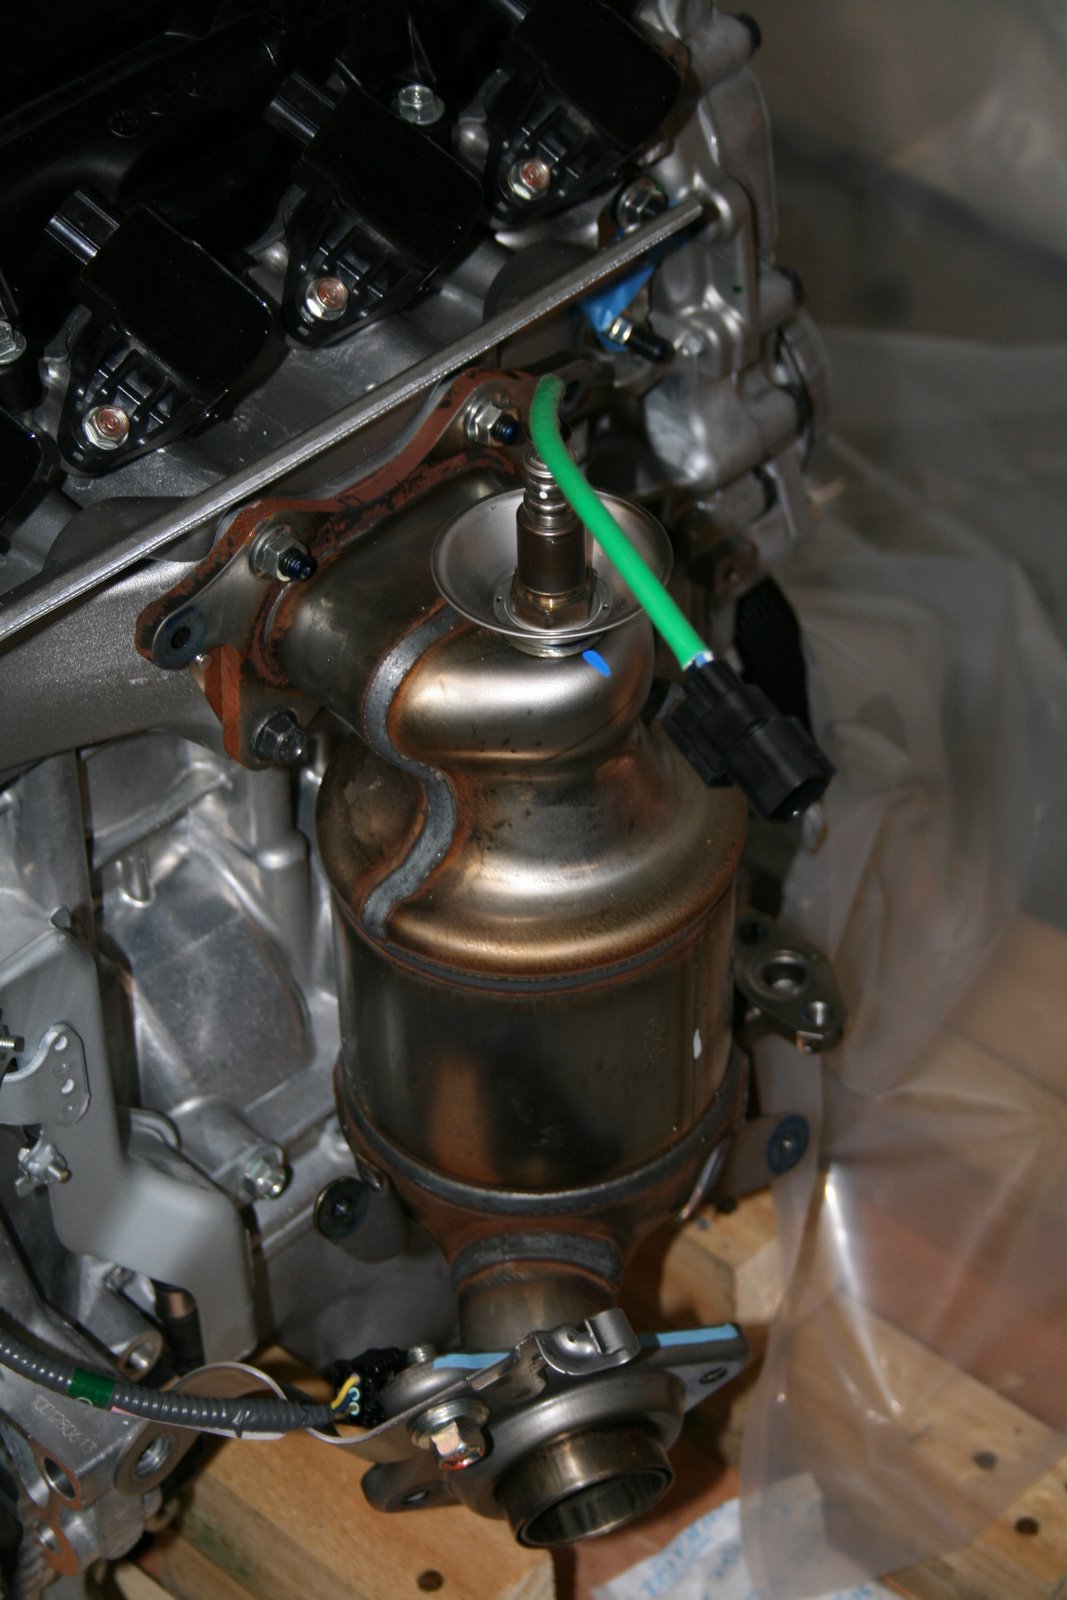
In reading through the instructions and looking the the contents of my HPD "Race Kit", I noticed a few important pieces were missing.  Specifically, I do not have an alternator, and I do not have an ECU.  Furthermore, it appears that there was a mixup and the bellhousing adapter and input shaft that were shipped to me were the Van Diemen LD200 spec parts.

So this afternoon, I sent a quick e-mail to Julian at HPD to inquire about these parts and ask a couple of other questions.  To my surprise, I learned that neither the Alternator nor the Honda Racing ECU are actually included in the "race kit".  Which seems like an issue for future converters like me, because while an alternator can probably be sourced from a local wrecking yard, the ECU is not optional for the engine to work, and can only be obtained from HPD.

But apparently they are included in the "Complete Chassis Conversion" kits (HPD should consider making this clearer on their web site).   My car is a Citation with a low production volume will never warrant a complete chassis conversion kit engineered by HPD, so I had thought the best course of action was to order the engine and race kit only and source the other parts only as needed.

Julian was very helpful and called me within 10 minutes of me sending the e-mail.  After some discussion, we decided that the best course of action was for me to turn my order into a Swift DB6 complete kit.  This is the most economic way to source the ECU ($1000), Alternator ($500), Bellhousing Adapter, and Staffs input shaft and will give me the added benefit of getting the fuel system parts, cooling tubes, heat shields, overhead exhaust system etc...

I fully realize that some of these parts will require modificiation or may not work at all on my Citation, but it is still the best option.  If I had just added the ECU and Alternator to my original order my total bill would have approached the price of the full kit anyway.

So, those parts are now on order.  My problem now is that HPD is shutting down for Christmas, so it will be after New Years before they can start getting the rest of the parts out to me.

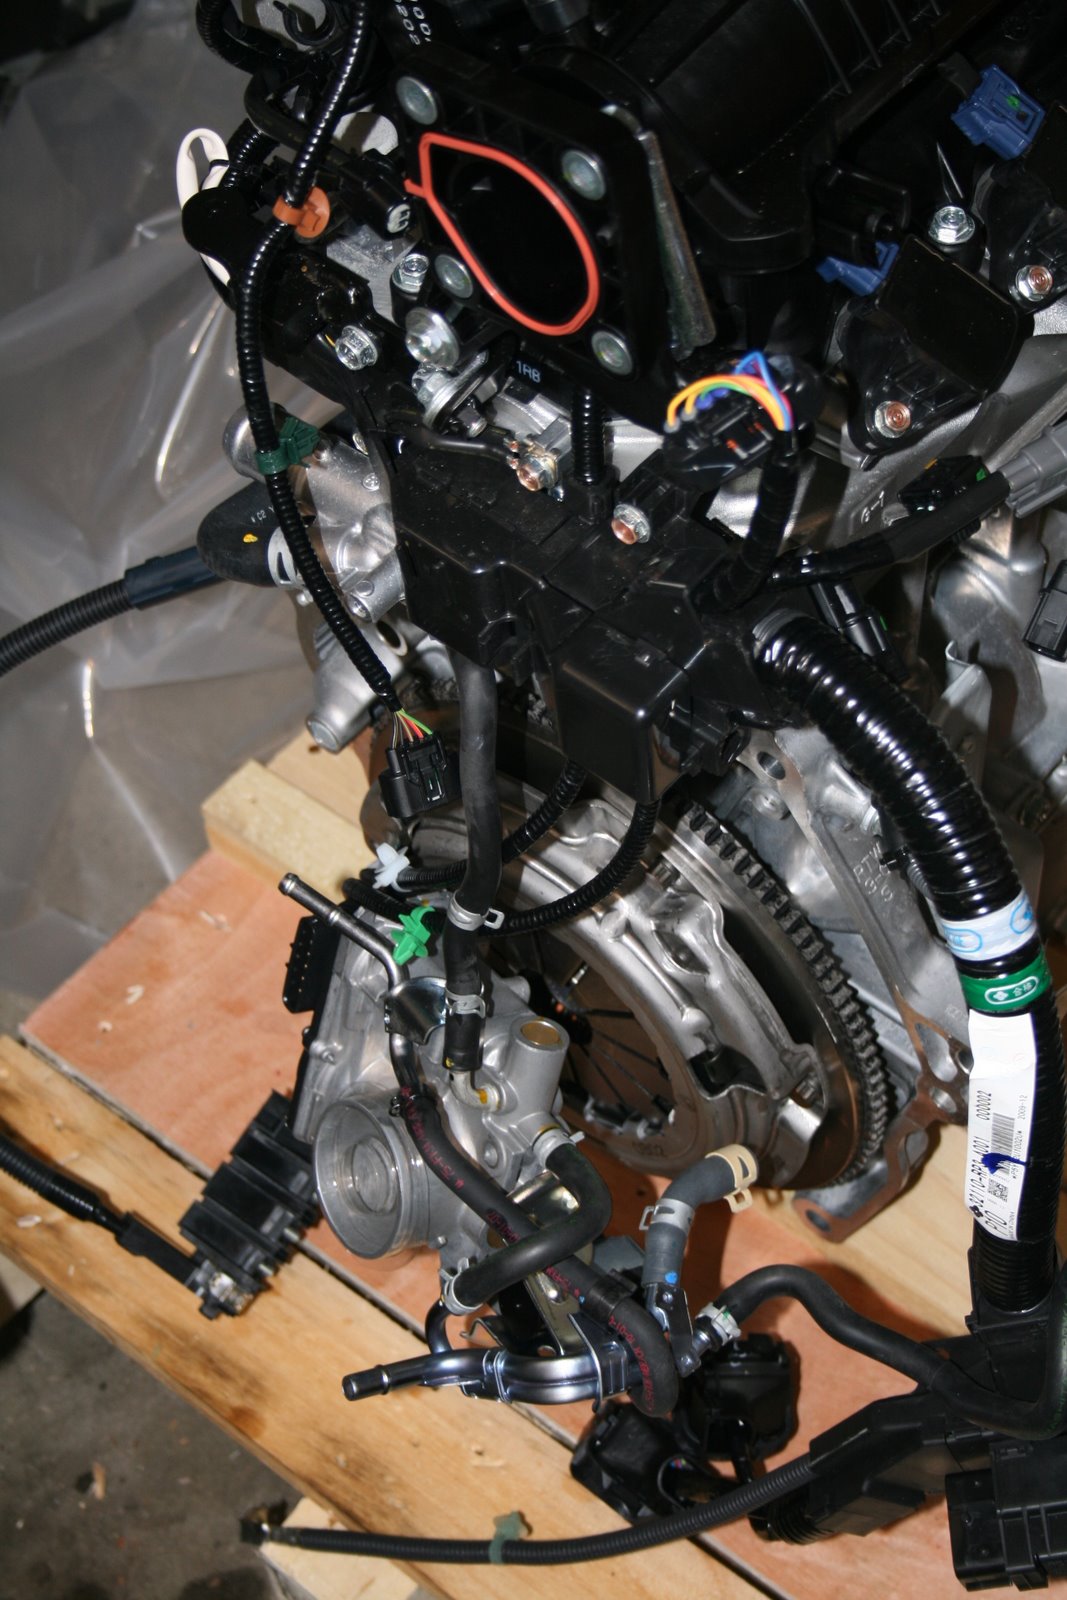
In the mean time, I will soldier on with the engine setup.  Tonight I completed the stripdown process to the point where I need to put the engine up on the stand and pull the Harmonic Balancer and begin the work on the oil pan.  This looks like it will be the most technically challenging part of the process, and will probably keep me occupied through a lot of the holidays anyway.

If I run out of things to do before the parts arrive, I can always start into removal of the Pinto motor from the chassis (I probably should have done this beforehand anyway)...

More to come soon...
Sean

Exhaust Removal (Part 2)

"Special Tools Required"  Exhibit 1:  The factory O2 sensor is recessed into the heat shield top.  A $15 O2 removal socket (with a slot in the side for the sensor wire to hang clear) really helps.  I am told that an AN wrench will work too, but I always like an excuse to buy a new tool.  Besides the new exhaust system will have an O2 sensor I think, so it will come in handy down the road.
With the sensor removed, the heat shield comes right off the top.  (I put the sensor back in to the catalytic converter to keep it safe and clean.  I am planning to eBay off the unused Honda Fit parts when the project in completed).
With the converter removed, this is the "exhaust header" as it will be used in the race application.  I chose to put these bolts and nuts back into place to retain the metal gasket.  Shortly after the picture was taken I covered the hole with masking tape to keep the innards clean and dry.Posted by Picasa

Throttle Body and Water Outlet

Removing the wiring harness for the injectors was a bit of a mystery at first.  A firm push with a small screwdriver on the two slots in the aluminum tabs on the left and right did the trick.
Stock Wiring Harness now completely removed.  Note throttle body still hanging from the water outlet tube, waiting on WD40 to soak in to ease removal.  (Still was a pain in the ass, but eventually it came off).
Injector rail with Wiring removed.
Water Outlet can now be removed.  Takes some light blows with a rubber hammer to break the factory silicone seal.Posted by Picasa

Removal of Stock Wiring Harness

Throttle body must be removed to get to the Wiring Harness Mounts.  The hardest part of removing the throttle body (for me at least) was getting the hose that connects it to the water outlet to release.  WD40 and patience...


Before the Wiring Harness can be completely removed, the Intake Plenum and runners need to come off.
Intake Plenum now removed.  Lots of Sensors to disconnect as well as the fuel injectors and coils
Runners and the rest of the harness off.  The engine is starting to look pretty bare now...Posted by Picasa

Exhaust Removal (Part 1)

Wednesday night 12/22/10 beginning the removal of the exhaust system...  Only to find that I do not own a wrench or socket that will work on the stock O2 sensor.  Without removing the sensor the heat shield will not come completely off and the exhaust flange bolts are VERY hard to get to...  Note to self:  stop by Toano Autoparts and get an O2 Sensor removal socket tomorrow.
EGR Tube removed.  The HPD manual refers you to the Honda Fit manual for reference on this part.  (I am unclear why as it is a simple part held on by two bolts at the converter end and two nuts on the studs at the engine block).
EGR Sensor removed.  I chose to leave the fastners and stock gasket in place for later installation of the blocking plate included in the HPD kit.Posted by Picasa

Thursday, December 23, 2010

Working late

     Last night I started in on the race kit conversion for the motor.  The process is fairly well documented in the HPD illustrated manuals, and went without any major trouble.  (I do need a couple of special tools though to pull the sensor from the exhaust and the front engine mounting stud out - but I just skipped over those steps for now).

     The engine is quickly shrinking on the pallate. and now looks more like a "long block" than a complete production car motor.

     I got a little carried away with the process and next thing I knew it was very late, but I had gotten to the "remove VTEC Pressure Sensor" step...

(Pictures will be posted later this afternoon)

Sean

Tuesday, December 21, 2010

Cracking the crate...

Small box in the bottom of the crate containing the water outlet housing and thermostat.
Without a lift handy (low ceilings in my "shop"), I chose to disassemble the crate and leave the engine on the pallet until I am ready to put it on the engine stand...
Fit engine in all of its production-line glory...  It was all I could do at this point to cover it back up and go to bed.   Later this week it will go up on the stand and the race kit conversion will begin...I have read and re-read the manual from HPD and am very eager to get the process underway...more later this week (Christmas commitments willing).Posted by Picasa

Unpacking (continued)

Boxes inspected and repacked...  Now on to the crate...
Honda Fit motor crate label...  Does that qualify as irony "American Honda...Made in Japan"


The top comes off of the crate to reveal that the motor is packed just as anally as the Race Kit parts...Posted by Picasa

Unpacking...

Each of the boxes was incredibly neatly packed with vacuum packed padding.  Note the Staffs/DB6 input shaft above...
Intake plenum, oil pump, filter, and other conversion pieces...
Each smaller box was also packed with the same attention to detail.


Second box contained the oil pan and bell adapter.Posted by Picasa

The Honda Kit Arrives

A new adventure is underway here in the Maisey garage.  The new Honda Performance Development (HPD) kit arrived this afternoon...
The kit was VERY neatly packed up in a large single box with the assembly-line Honda Fit motor in the also very nicely constructed crate.

Inside the "Kit box" were two smaller boxes containing the Racing Kit parts as well as the Swift DB6 spec Staffs Input shaft and Bellhousing adapter.  I am told that the DB6 parts will be appropriate for the my Citation SF95 chassis as well.Posted by Picasa

Tuesday, January 5, 2010

post New Year's Day

So, the hike went great... 3+ miles of nature and peace. My legs felt strong for the first time in a long time. It was great to be out in the cool crisp air...

The next day I woke up to a knee the size of a volleyball, and could barely walk at all. Only today (Tuesday 1/5) did I begin to feel semi-normal again.

So I guess there really is a gap between what your doctor says you "can do" and what you "should do"... I will probably continue to explore this border some more :)

Random thought: I heard April Wine's "Sign of the Gypsy Queen" on my way to work this morning. It turned back the clock to high school for just a few minutes - a nice thing.

See ya,
Sean

Sunday, January 3, 2010

New Years Day


Bored and restless on New Years day. My buddy Jeff called and suggested a hike on one of the local trails. I was a little skeptical that I could do it, but I decided to give it a try.

We hike the main Wanrani trail near the town of Eltham in New Kent County, VA. More on the trails here: http://www.hikingupward.com/OVH/Wahrani/

I did better than I thought I would. Some of the stream bed down hill sections were a little scary with a dicey left knee and limited range of motion for my right arm. But, we made it through unscathed. It was a pretty good personal accomplishment, given that my previous longest walk was probably on a trip to the local Farm Fresh!

Happy New Year!